Test Index · Photo Borders · Table of sliced images - Rounded corners · Sliced images and manually linked · Overlap Images · Create a Watermark · Gif Png Transparency · Buttons-Image Links · Image Names · Image Theft · Lake Applet · Other applets · Slideshow1 · Slideshow2 · Slideshow3 · Galleries · DD Thumbnail Viewer · image map · xara thumbnail · Random Image · LOGO BRANDING · Animated Image · photo with sound
Overlap Images
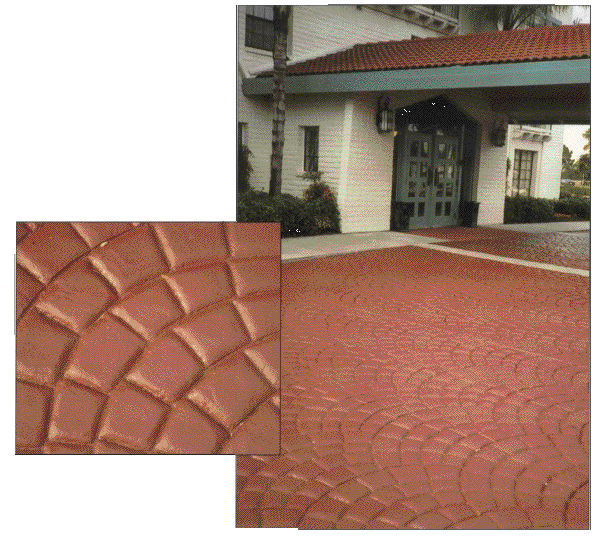
Tables allow you to overlap images for dramatic effects. The image to the right is a
3 layered table creating a look of a matted frame.
The outside table is a simple one column one row table made in CSB, set to 344 pixels wide with a white background color.
The second and third tables are made using HTML code that is placed into the center of the white table using insert > HTML (webgem in Trellix).
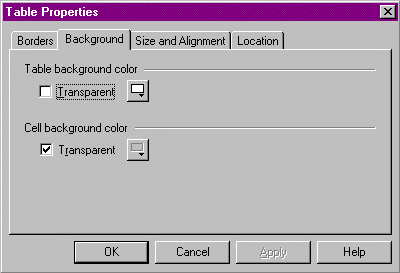
The second table has an image background, a small blue square (automatically tiles to fill the table). The third table has no border, and its background is the jumping image.
The code for the layered image is below.
Richard's layered image in a table shows a another example of overlapping images.
If you would like this image effect, combined with text or with mouseover links that change color and to CAPS on rollover, then visit my background section and see Example 4!
|
|
If you want two images to truly overlap, separate photo editing software (like Paint Shop Pro, Photoshop, Photosuite, etc) is necessary. Create the blended photo then insert into webpage.
sample photo is shown below uses transparency setting
If assistance needed with transparency, see this page)
|
Capture code here: press Select All then COPY the contents
Place code into an insert > HTML (webgem in Trellix)
MUST change each gEMDIR to GEMDIR before using code!
I have made notes in codes below and it will effect functionality!
Use the Select All choice above to copy code!
Two steps:
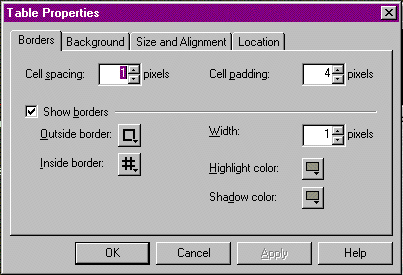
1) Make a table in CSB. Set the cell spacing to 1 and the padding to 4.
2) Place this script which makes the second and third layers into an Insert > HTML (webgem in Trellix)
inside the first layer table made in step 1.
Center the webgem.
Include the images for the 2nd and 3rd layers in the webcomponent.
Change GREEN items to the colors of the 2nd layer border (I used blue tones #000080)
Change GREEN items to your image name and size for the 2nd Layer. Set table and image to same size.
Note: The blue background image is only a small block, but setting the image size stretches it to fill the large table.
You have to know the innermost image size (my horse picture) that is used in the 3rd layer to calculate the 2nd layer.
I defined the table as 330x409 so the blue border would be 43 pixels wider on each side than the inside image (horse):
2nd table calculation: take the 3rd table image (inside image) 244 wide+ 43 left side + 43 right side = 330 wide
2nd table calculation: take the 3rd table image (inside image) 323 wide+ 43 top side + 43 bottom side = 409 high
Change BLUE items to your image name and size for the 3rd Layer. (Note: my horse image is 244 x 323)
<table border="2" bordercolordark="#000080" bordercolor="#000080" bordercolorlight="#000080" cellpadding="1" cellspacing="1" width="330" height="409">
<tr>
<td align="center" background="^GEMDIR/dkseablueparchment.jpg" valign="Middle" width="330" height="409">
<p align=center>
<table background="^GEMDIR/baypjumpweave.jpg" border="0" cellpadding="6" cellspacing="2" width="244" height="323">
<tr>
<tD VALIGN=TOP HEIGHT= 112 >
<NOBR>
<div>
</NOBR>
</td>
</tr>
</table>
</p>
</td>
</tr>
</table>
|